Blog

How Does a Storm Typically Damage a Roof?

close-up of damaged roofing shingles

How do you know your roof has been damaged in a storm?

During the springtime, it isn’t unusual for some major storms to blow through. And in the aftermath of those storms, there is often a lot of damage and destruction. Because of that, roof storm damage repair in Salina, KS is often needed. However, a homeowner needs to know how a storm damages a roof so they can know what to watch out for. That will ensure you know when you should be reaching out to a professional to get the repair services you need. 

What are the most visible signs of roof damage?

The sooner roof damage is discovered, the sooner the roof storm damage repairs can begin, because if they are left unaddressed, even the smallest damage can lead to more significant damage over time. Eight things that homeowners should be aware of after a storm include: 
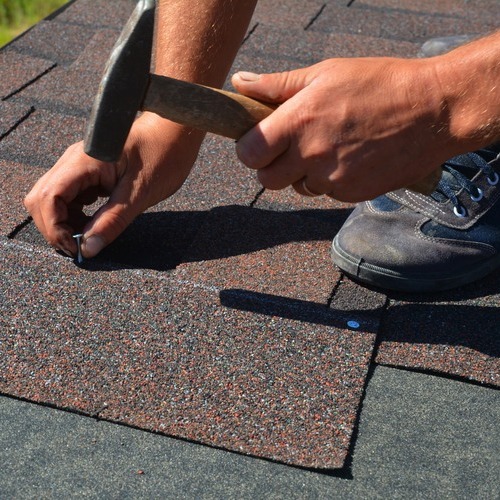
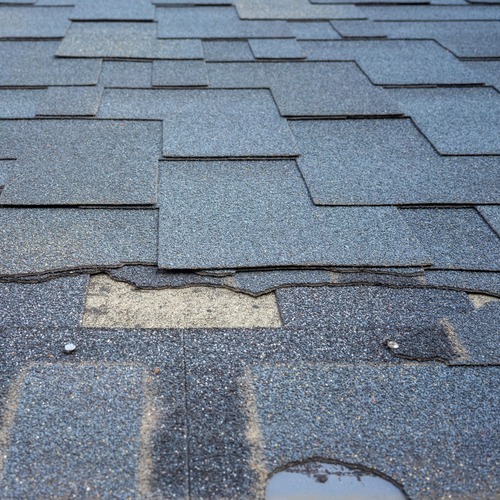
Damaged Shingles

If you notice several shingles are missing, or you can see cracked shingles, you most likely need roof storm damage repairs. Sometimes, those also are indications that your roof has reached its age limit and simply needs to be replaced. A roofing contractor and the insurance adjuster can advise which scenario applies to your roof. If it is storm damage, getting the roof fixed by reattaching loose shingles or replacing damaged and missing shingles is recommended as soon as possible. 

Water Stains

Roof storm damage can be visible inside your home too in the way of water stains on the ceilings and walls. If you notice water bubbles, or bubbling or peeling paint,  you most likely need roof storm damage repairs. 

Poor Ventilation

Attic ventilation is essential to the health of a roof. When the ventilation isn’t working properly, you probably have some roof storm damage. Repairs will include not only the shingles, but also repairs, and maybe expanding the attic ventilation. 

Tree Branches

With the high winds that typically accompany spring storms in Georgia, it is common to find tree branches on the roof. A good healthy roof can handle these, but if the velocity of the wind has tossed those branches down hard, it can leave you needing roof storm damage repairs. 

Algae and Moss 

Any areas of a roof that don’t receive much sun will often develop pockets of algae moss spores. While this can give a home a ‘quaint’ appearance and seems harmless, those spores are eating away at the shingles, and disrupting the matting underneath. Without getting immediate roof storm damage repairs addressed, your roof is susceptible to more damage. At the very least, a professional roof cleaning service is in order.
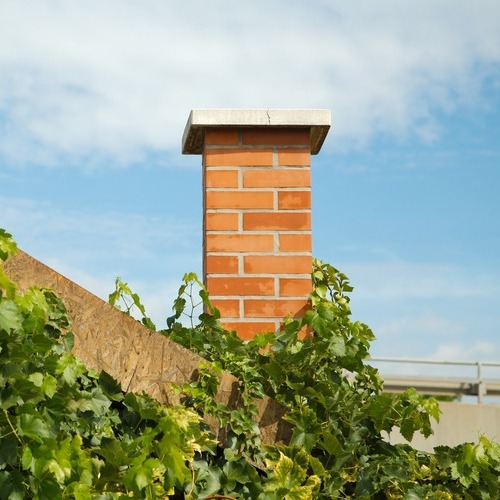
Damaged Flashing

Pay attention to any possible damaged roof flashing, the thin layered strips of metal around the chimney, skylights, vents, and along roof valleys. Flashing redirects water flow away from these areas that are prone to leak. 

Gutters and Downspouts

Check the gutters and downspouts after each storm and have them professionally cleaned and inspected at least once a year to keep them healthy. They will fill up with foreign objects, branches, twigs, and leaves, become clogged, and unable to do the jobs that are intended. 

Critter Infestation

When small critters take up residence in your attic, you need to have your roof inspected for roof storm damage repairs! Or your roof may have reached its maximum lifespan and needs to be replaced. 

Can you repair the parts of the roof?

Maybe. If there is a damaged section that can be repaired and the rest of the roof is still stable, then yes, partial roof storm damage repairs are possible. The general rule of thumb in roofing is a roof that has 25% or more damaged area must be 100% replaced. 

Can you just replace a section of a roof?

The same rule of thumb applies to roof replacement. If 25% or more of the roof is damaged, the entire roof will need to be replaced. A partial repair or replacement will leave your home with shingles or other roofing materials not uniform. Meaning some of the roofing will look brand new while the majority looks aged and likely faded.

Is patching a roof worth it?

If it is keeping your home from further damage, like water or wind, for the current time, then yes, a roof patch job will suffice until you can have complete roof storm damage repairs or replacement done. 

Getting Down To The Dollar

Overall, the end gest to this article is to realize the importance of roof storm damage repairs. Letting these things ‘slide’ until you get around to it will put your home in a position of further damage – especially water damage. 

Water damage is the worst of all types of damage your home could endure from a storm. Water begins to rot the wood and all surfaces will start to form mildew and mold, which puts spores into the air that can make your family sick. And family members with underlying conditions like asthma suffer the most. 

If you’ve noticed any of the things that we’ve mentioned here, have a professional roofing contractor inspect the roof. They will provide you with a written report and estimate that should be shared with your insurance company as you file a roof storm damage repair or replacement claim.

We’d also like to remind you that if you need roof storm damage repair in Salina, KS or the surrounding area, you can always count on the team at Legacy Roofing of Kansas to provide any services you need. Give us a call at 785-838-8604 and we can get things started with an inspection to identify any damage that may have been caused by the latest storm.

What is the Process of Installing a Roof?

close-up of a worker nailing down asphalt shingle roofing

What should you know about roof installation?

As you drive through the streets of Salina, KS, you may not give the roofs a second thought, (unless you see one that has fallen in). Keeping this in mind, you certainly don’t give much thought to residential roof installation either – at least, not until you need a roof installation for your home. 

What are the steps to installing a roof?

The roof on your home not only protects the contents and occupants, it protects the structure itself. It can be helpful to have an idea of what goes on during a residential roof installation. The following are the basic steps for an asphalt shingle roof while other roofing materials may have some variance from these steps:  

Step 1: Tear Off the Old

Before a new residential roof installation can take place, the old one has to come off. In the roofing industry, this is referred to as the ‘tear-off’ phase. The contractor will start at the bottom of the roof line and work up row by row. 

Step 2: Roof Decking Inspection

After the tear-off is done, the roofing team will inspect the roof decking. This is an important component as the base and structural support for the shingles and other roofing materials. During the inspection, in addition to the decking, they will check the sheathing and check for mildew and rot as well as any moist areas. If any repairs are needed, they will do this now. 

Step 3: Flashing Inspection

With the old roofing material gone, the residential roof installation team will inspect the flashing around the chimney, dormers, skylights, valleys, and vents, replacing them as needed. Joints and valleys need flashing installed to prevent water from seeping under the shingles. 

Step 4: Drip Edge Installation

Now the drip edge is installed before the underlayment. This is a critical component of a residential roof installation that diverts water off the roof and into the gutter. 

Step 5: Underlayment Installation

Another critical component of a residential roof installation is the underlayment. This is a felt paper material that maintains the roofing system’s integrity by shedding water. 

Step 6: New Roofing Material Installation

Now comes the part you see from the street! The asphalt shingles, or other roofing material, are installed now.

Step 7: Clean Up

Now is the time for the residential roof installation crew to clean up any debris, their equipment, tools, and leftover roofing material. Many contractors will have a dumpster brought to the job site, or they’ll have a trailer where the crew will toss the debris. 

The last step is the inspection by the lead contractor. They will inspect the entire roof to ensure all is installed correctly. They will usually have the homeowner walk around the outside of the home with them as a part of the inspection. If something doesn’t look right, now is the time to speak up.

What is the cheapest way to roof a house?

There are many options in roofing materials to choose from today for a new residential roof installation, but asphalt shingles are still the least expensive of all. Within the asphalt shingle group, there are three different types: 

  • 3-tab asphalt shingles
  • Architectural asphalt shingles
  • Luxury asphalt shingles

What is the lifespan of asphalt shingle roofing? 

A standard 3-tab asphalt shingle roofing will usually have a 20-year warranty by the manufacturer, but you can expect to replace it within 15 years.  An architectural asphalt shingle roofing material typically has a 30-year warranty, with actual replacement could be within 20 to 25 years.  The luxury asphalt shingle roofing material has a lifespan of up to 30 years with the lifespan expectancy the full 30 years. 

Can you install a roof by yourself?

How hard is it to roof your own house? If you’re handy with basic tools and have a helper or two, A DIY residential roof installation with asphalt shingles is possible. Do not attempt this without at least one other person with you and be sure to wear proper PPE (personal protection equipment).

How long does it take to put a roof on a house?

The size of the structure will have an impact on the time it takes, as will the weather. For a basic home with 1200 square feet, a professional roofing contractor team can complete a residential roof installation within 1 day.  If you’re going to install the roof yourself, it will probably be a full weekend project.

Keeping It Healthy

Once you have a new residential roof installation done, you can assist the lifespan by keeping a routine of gutter cleaning and having the roof professionally washed every two years.  Do an inspection each month yourself and after any significant weather event. A professional inspection by a roofing contractor should be done every two to three years, and if you find any issues after a weather event, it should be inspected by a professional too.

And remember, if you need a residential roof installation in Salina, KS or the surrounding area, you always have the team at Legacy Roofing of Kansas to help. Just give us a call at 785-838-8604 if you’d like to learn more.

Can You Repair a Chimney?

a brick chimney on a roof covered in ivy

What should you do with a damaged chimney?

This area is full of history as proven by the existence of many old structures, with many being in various levels of dilapidation. Many even include the need for minor and extensive chimney repairs. In Salina, KS, if you have found yourself in need of this kind of service for your building, you likely have a lot of things to consider, including whether this kind of repair is worth it. We’re here to provide answers to these and other common questions.

What causes most chimney deterioration?

A chimney begins to deteriorate the first time you light a fire in it, and each time it is used, it will deteriorate a little bit more.  The lifespan can vary based on the type of chimney and how frequently it is used. However, by keeping it well maintained, you can extend its lifespan and useability while eliminating the need for expensive chimney repair. 

A chimney made of concrete will be strong, but you need to consider the intenseness of the heat from the fires you build, as well as the weather conditions it is exposed to outside. Some other factors that contribute to the deterioration of a fireplace include: 

  • A fire can produce corrosive components that erode the silicate hydrates that bond the concrete, weakening the surface so that moisture can get inside, leading to cracking and spalling.
  • Flue gases leach into the area between the chimney’s shell and the liner, causing it to corrode. Over time, the liner’s coating begins to break down, allowing the hot flue gases to leach through to the chimney shell.
  • Carbonation is a process that will cause extreme amounts of carbon dioxide. That carbon dioxide comes in contact with the concrete, causing it to weaken. That in turn causes the reinforcement steel to start rusting. Over time, this puts the structure in jeopardy. 

While it will take years before you begin to see these effects damage your fireplace, when they do become apparent, you can be sure that the chimney repairs will be costly! You can avoid this expense by having a professional chimney sweep inspect and clean your chimney each year either after or before winter use begins. 

Can a chimney with cracks be repaired?

A chimney that is well-built and well-maintained will give you years of enjoyment and warmth. However, if your chimney begins showing any indication of damage, it’s just a matter of time before you can experience more than expensive chimney repairs. 

When it comes to small cracks that aren’t zigzagging throughout the chimney, it isn’t in any immediate danger of collapsing. However, it is prone to water infiltration that can lead to more serious damage and costly chimney repairs. Just like the streets we drive on, once the water has infiltered into the cracks of a chimney and the temperature drops, that water freezes, expands, and expands the crack. 

From there, it is just a matter of time for the concrete to expand, and eventually, the melted ice water will gain access to the inside of the chimney. So, yes, even the most minor of cracks can be addressed by you. You can use a waterproof coating that fills and seals the crack, following the package instructions. Or if you’re not one to climb on the roof, or the cracks are large enough and the bricks are crumbling, call a professional chimney repair service. 

How is a crumbling chimney repaired?

A crumbling chimney isn’t always related to poor maintenance. They can be constructed with poor quality materials (bricks or mortar), or poor labor and crumble.  So, if you see some crumbling or spalling on the chimney, it can sound frightening, but if you address it quickly, either doing your own or having professional chimney repairs done, it will save the chimney and your home. 

If you want to try your chimney repairs, we can give you the steps to follow, starting with inspecting and assessing the situation. This will allow you to isolate the problem so that you make targeted chimney repairs. Before you begin your chimney repairs, determine if it is a widespread issue or if you can’t identify the problem, stop right there and call a professional. 

If you see that there is just a handful of crumbling bricks in one location, inspect all around the areas, checking the mortar, chimney cap, and crown. Check the sealing around the cap and crown, and if you don’t see sealant, apply a waterproof sealant. 

Next, chisel out any mortar where the bricks are crumbling, and replace them with new mortar, new bricks if they are completely or over 25% crumbled. 

Will homeowners’ insurance cover a cracked chimney liner?

Maybe, maybe not, it will depend. Any chimney repairs needed due to a sudden, unexpected incident are typically covered by homeowner’s insurance. However, if the insurance adjustor deems that the chimney repair is needed simply because the chimney has been worn out based on normal use, your homeowner’s insurance will not pay. They will also not pay if the adjustor deems the chimney and fireplace have been neglected. 

The Final Dollar

If your chimney has been destroyed, it may be necessary to either close the fireplace off or replace the chimney.  How much does it cost to replace a chimney? That will depend on the type of material used for the chimney. You can expect on the low end to pay around $3,500 and this can go upward to $10,000 or more, with the average being around $5,000 to $6,000. However, this is just an estimate, and you should talk with a professional contractor before settling on a price range.

And remember, if you need chimney repair in Salina, KS or the surrounding area, you can always count on us to provide you with the help you need. Just call 785-838-8604 if you’d like to learn more about the services we can provide.